 Sign in to Mod The Sims
 Useful Ruin Building Blocks
 Useful Ruin Building Blocks


Artrui_ruinBuildingBlocks_set example.jpg - width=1024 height=768
Artrui_ruinBuildingBlocks_set example2.jpg - width=1024 height=768
Artrui_ruinBuildingBlocks_trims.jpg - width=1024 height=419
Artrui_ruinBuildingBlocks_remapANDtexturePaint.jpg - width=2068 height=1305
Artrui_ruinBuildingBlocks_comparison2.jpg - width=1024 height=492
Artrui_ruinBuildingBlocks_10elements.jpg - width=1024 height=768
Artrui_ruinBuildingBlocks_11matchedColors.jpg - width=1024 height=768
Artrui_ruinBuildingBlocks_catalog.jpg - width=1024 height=768
1. Ruin building blocks, go-through-able
2. Ruin invisible benches and chair, marked with ivy (links coming soon)
3. Ruin Ivy decorations, go-through-able (links coming soon)
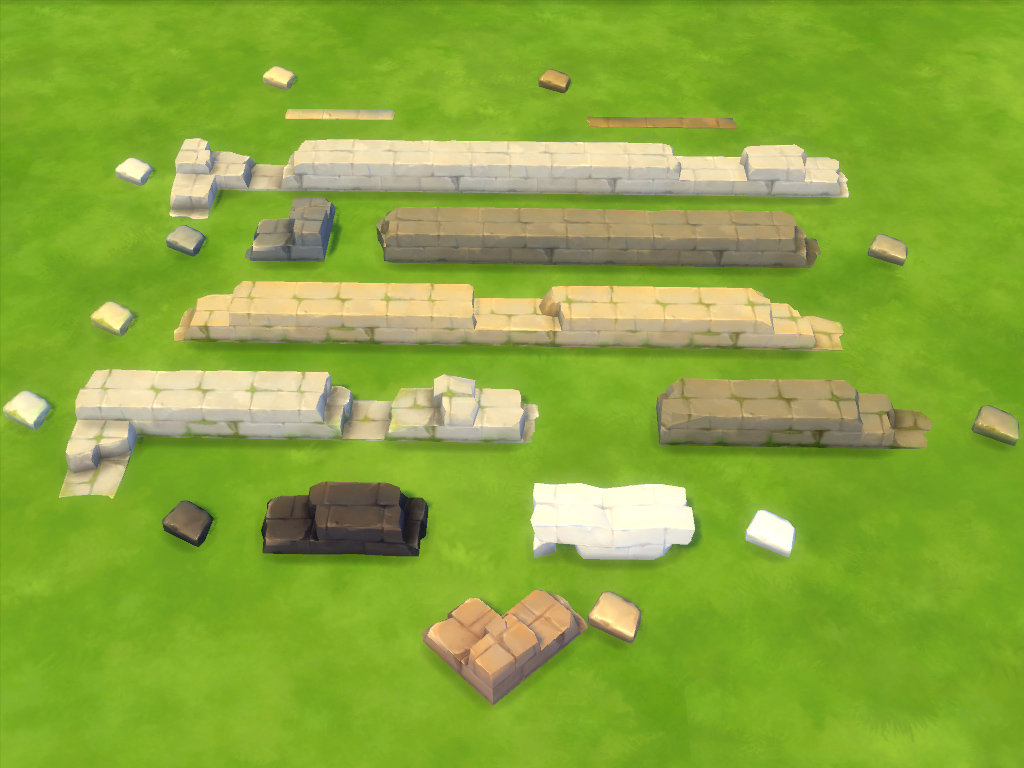
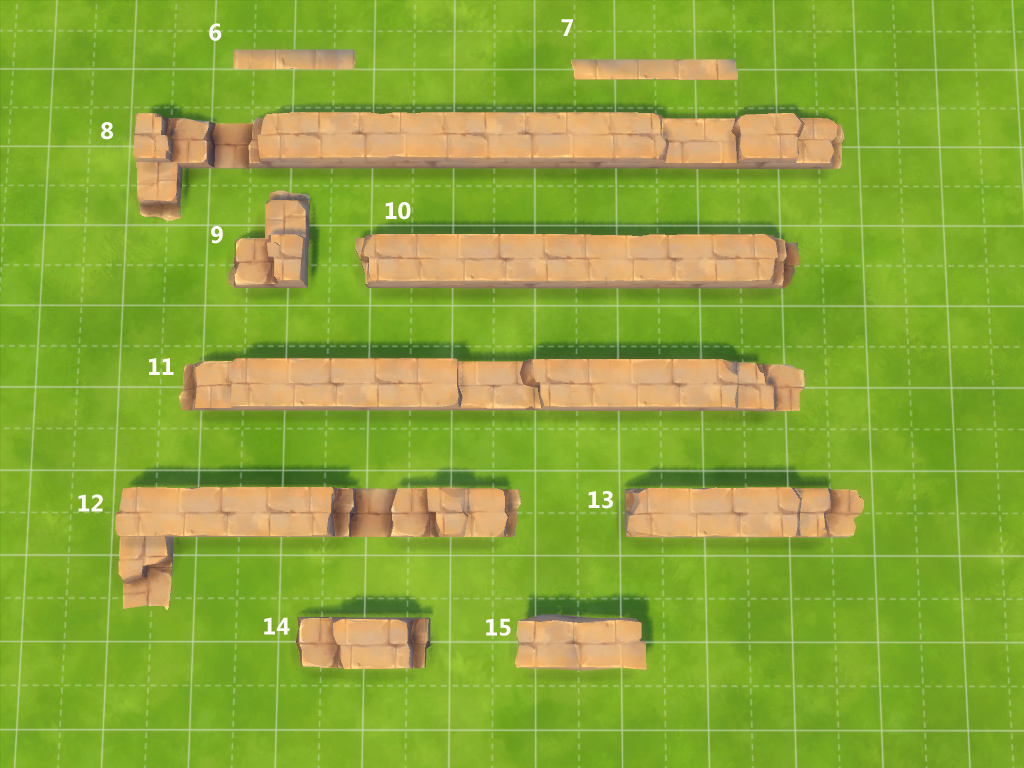
Here is the first part: 10 pieces building blocks
Perhaps, from first look, you find this set is similar like the Get Together ruins stuffs. As a matter of fact, there are a lot of works I made in this set:
Feature 1: go-through builging objects
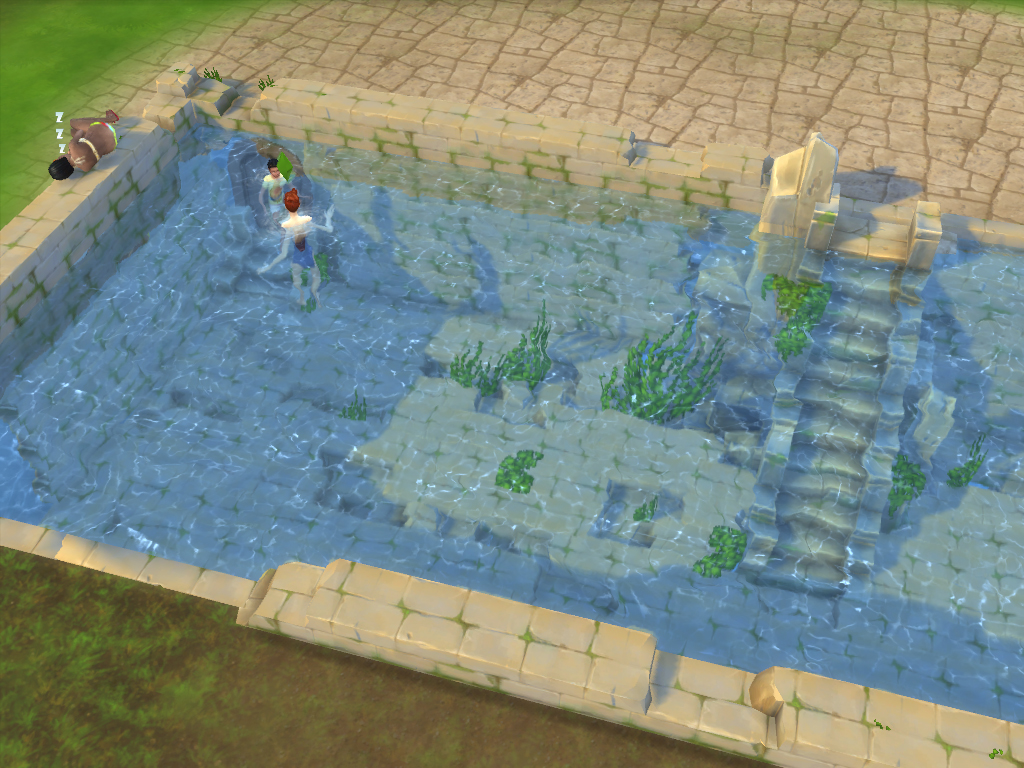
Like my Useful ruin stairs, these 10 pieces ruin stuffs are all complete go-through objects. They have the numbers in name, sorted after the ruined stairs set: ArtruiRuinGoThrough6 - 15.
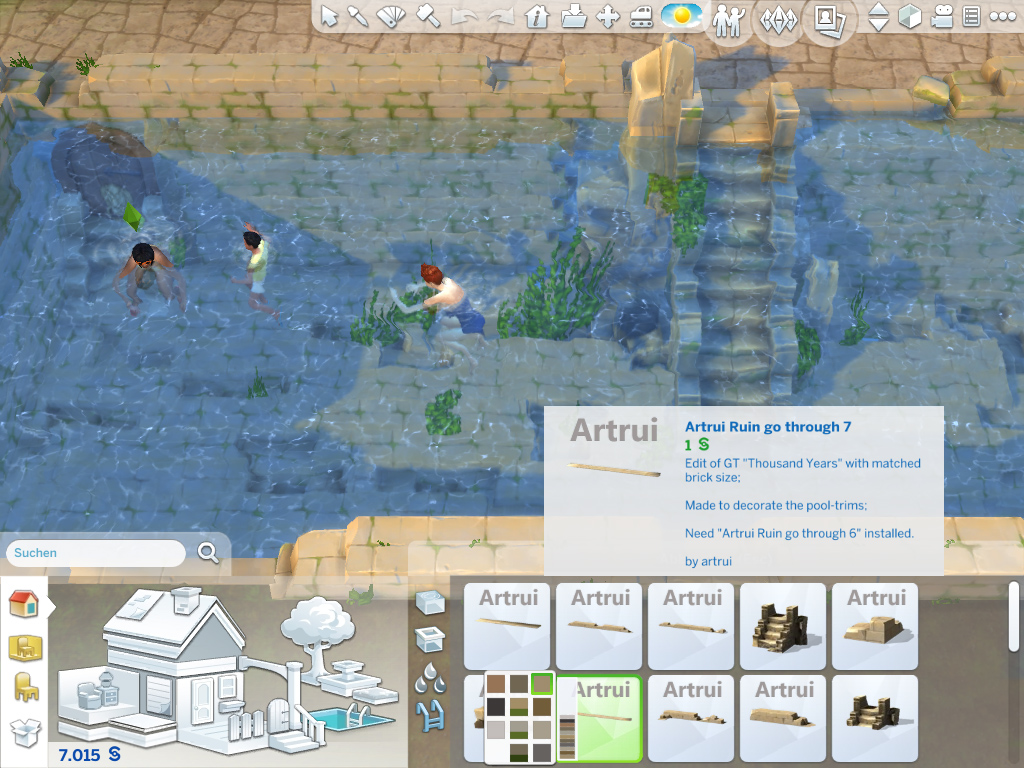
You are able to put them on the ground of pool without using bb.moveobjects cheats. (To put them on the edge of pool needs MOO cheat.)
See the screenshot below: It's exited to build a under water world with these ruins stuffs! The test tell us: the pool is swimable, although it is covered with these building stuffs.

Feature 2: adjusted the heights
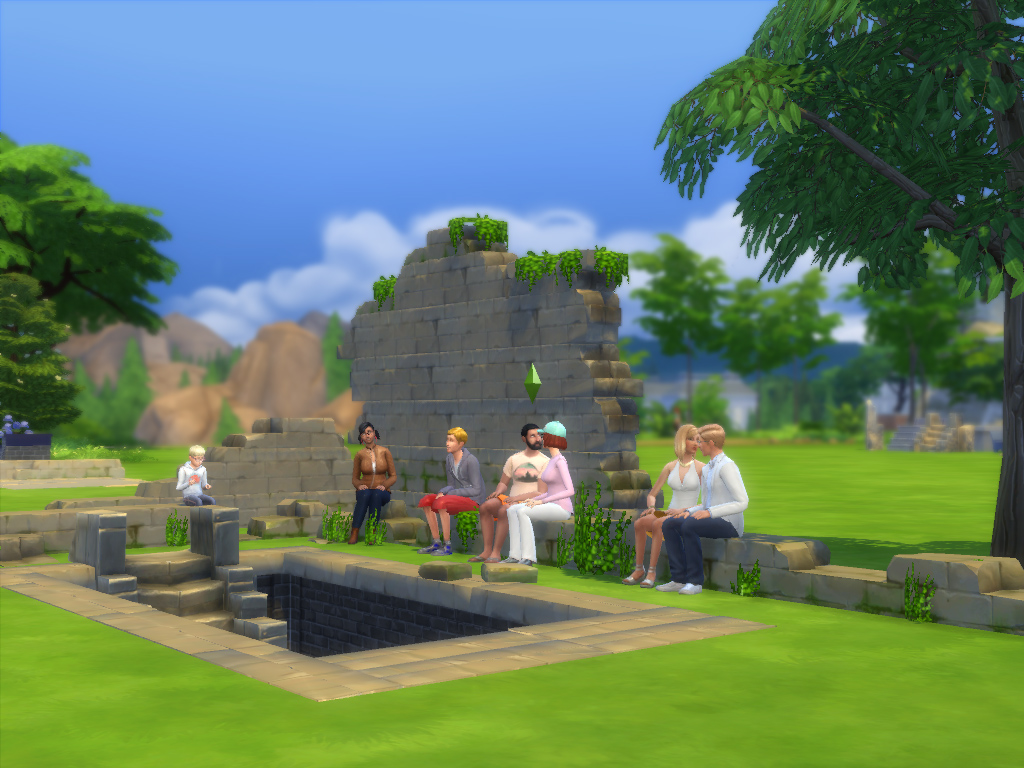
The ArtruiRuinGoThrough8 - 15 have all seat heights. They work with invisible benches and chair (Set part 2), which make a lot of combinations of group seaters.
The number 8 to 14 have all one brick thick underground parts. You will need those parts, e.g. if you use them to decorate the edges of pool.
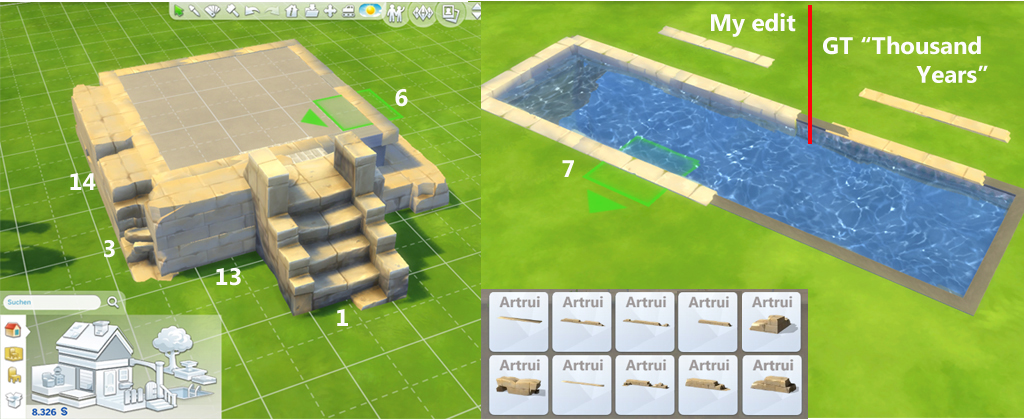
Base on this height, one can easily pile up these building blocks. Raise a block of them with 6 clicks (more), it will be put it exactly on the next height level. I've built the highest ruin wall (In the example below) by using the number 10 block (mostly).

Feature 3: different applications
The ArtruiRuinGoThrough6 is made to decorate the foundation trim. Enable MOO cheat at first. Then, just place it in grid like the screenshot below.
The ArtruiRuinGoThrough7 is made to decorate the pool trim. Enable MOO cheat, too. Then, just place it in grid like the screenshot below.
Feature 4: meshes and textures edits
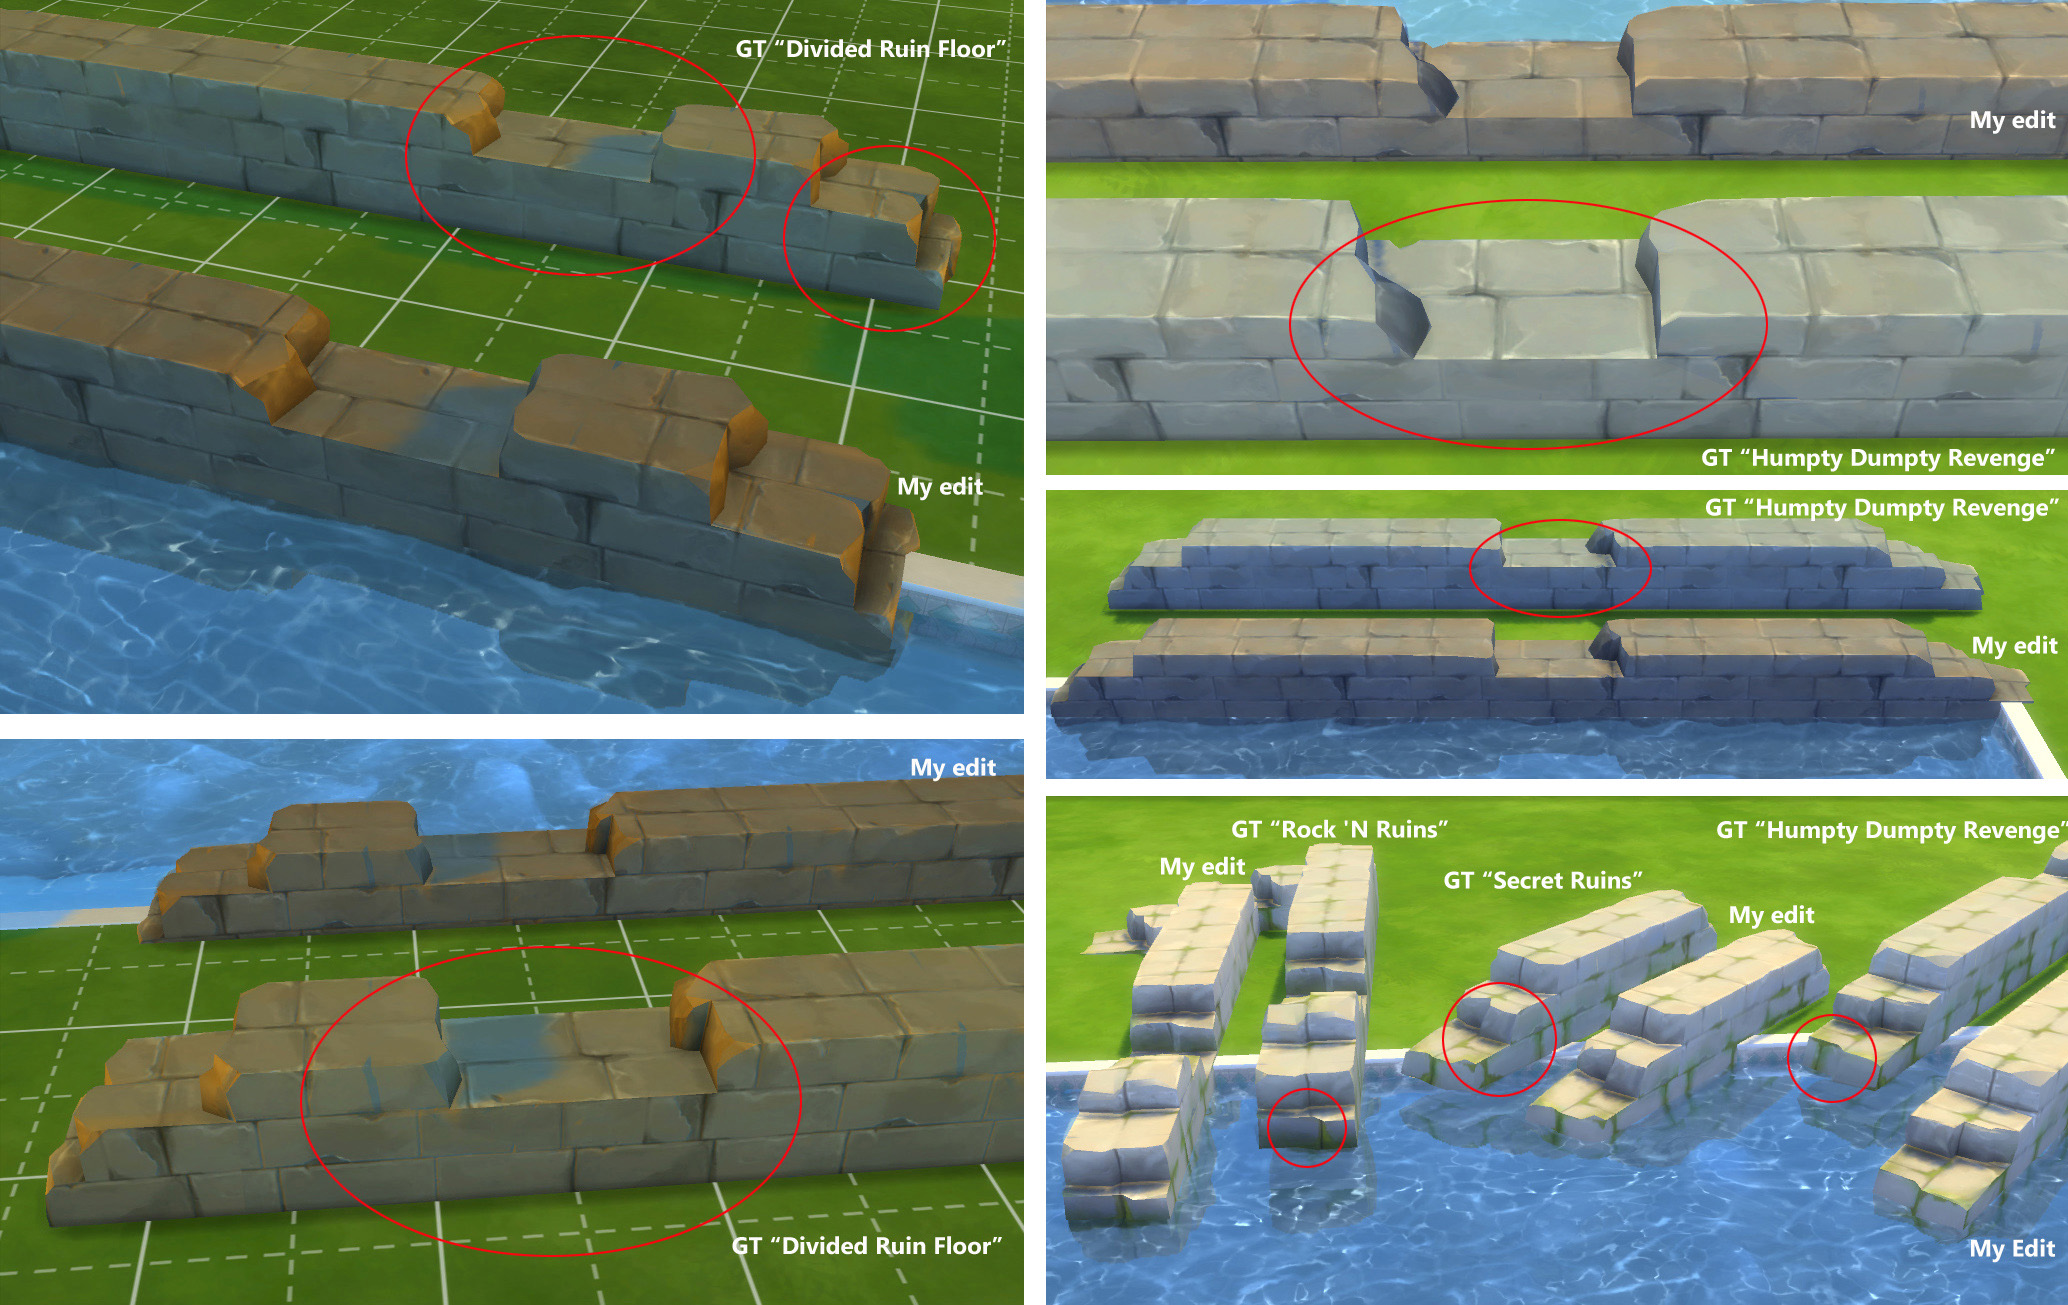
I have re-UV-maped the meshes, mainly to fix bugs that the top and sides surfaces of some bricks of the GT items don't coincide to each other. (See examples in: Artrui_ruinBuildingBlocks_remapANDtexturePaint.jpg)
I have also painted the texture partly. Especially, I've painted the lower part of the side-surfaces with similar colors from it's upper part. The lower part in those GT items is darker. It's for the case of stacking them to a wall.
Feature 5: matched colors
Some colors from different groups of the GT ruins items don't match each other (e.g. the gray in ruined stairs and gray in the Captured Ruin). I've adjusted the colors. These are made to match my ruined stairs set (11 colors for each).
Feature 6: use one texture-set
The ArtruiRuinGoThrough7 - 15 are selective clone. All of them use the textures from the ArtruiRuinGoThrough6. Because, I don't want to make the whole set too big.
They have also the same swatch colors and order.
Note:
- Find under build mode / pool/ pool accessories
- Price: 1
- have thumbnails
- Work in base game
- 7-15 needs 6 installed
Descriptions in game:
Artrui Ruin go through 6: Edit of GT "Thousand Years" with matched brick size; Made to decorate the foundation-trims.
Artrui Ruin go through 7: Edit of GT "Thousand Years" with matched brick size; Made to decorate the pool-trims; Need "Artrui Ruin go through 6" installed.
Artrui Ruin go through 8: Edit of GT "Divided Ruin Floor" -- bench height; Need "Artrui Ruin go through 6" installed.
Artrui Ruin go through 9: Edit of GT "Divided Ruin Floor" -- bench height; Need "Artrui Ruin go through 6" installed.
Artrui Ruin go through 10: Edit of GT "Divided Ruin Floor" -- bench height; Need "Artrui Ruin go through 6" installed.
Artrui Ruin go through 11: Edit of GT "Humpty Dumpty Revenge" -- bench higher; Need "Artrui Ruin go through 6" installed.
Artrui Ruin go through 12: Edit of GT "Rock 'N Ruins" -- bench height; Need "Artrui Ruin go through 6" installed.
Artrui Ruin go through 13: Edit of GT "Secret Ruins" -- bench height; Need "Artrui Ruin go through 6" installed.
Artrui Ruin go through 14: Edit of GT "The Captured Ruin"; Need "Artrui Ruin go through 6" installed.
Artrui Ruin go through 15: Edit of GT "Rustic Anatolia Ottoman"; Need "Artrui Ruin go through 6" installed.
Polygon Counts:
Artrui Ruin go through 6: 43
Artrui Ruin go through 7: 63
Artrui Ruin go through 8: 566
Artrui Ruin go through 9: 249
Artrui Ruin go through 10: 324
Artrui Ruin go through 11: 345
Artrui Ruin go through 12: 474
Artrui Ruin go through 13: 248
Artrui Ruin go through 14: 200
Artrui Ruin go through 15: 247
Additional Credits:
Sims 4 studio, Blender, Photoshop, paint.net;
Tutorial about selective cloning and about catalog thumbnails by orangemittens;
Request from CandelariaWhitechapel and thanks for some suggestions
This is a new mesh, and means that it's a brand new self contained object that usually does not require a specific Pack (although this is possible depending on the type). It may have Recolours hosted on MTS - check below for more information.
This mod has specific instructions!
Part 2: Ruin invisible benches and chair, marked with ivyPart 3: Ruin Ivy decorations, go-through-able
| Filename | Size | Downloads | Date | |||||
|
ArtruiRuinGoThrough6to15.rar
Size: 2.88 MB · Downloads: 10,757 · 25th Jan 2016 |
2.88 MB | 10,757 | 25th Jan 2016 | |||||
| For a detailed look at individual files, see the Information tab. | ||||||||
Key:
- - File was updated after upload was posted
Install Instructions
1. Download: Click the File tab to see the download link. Click the link to save the .rar or .zip file(s) to your computer.
2. Extract: Use WinRAR (Windows) to extract the file(s) from the .rar or .zip file(s).
3. Cut and paste the file(s) into your Mods folder
Need more information?
- Windows XP: Documents and Settings\(Current User Account)\My Documents\Electronic Arts\The Sims 4\Mods\
- Windows Vista/7/8/8.1: Users\(Current User Account)\Documents\Electronic Arts\The Sims 4\Mods\
- Anyone can use both .rar and .zip files easily! On Windows, use WinRAR.
- If you don't have a Mods folder, just make one.
The creator also recommends the following uploads:
#ruin, #stairs, #maxis add-on, #go through, #build stuff, #pool
The idea turns true
All my creations have the general creator policies: don't claim them as your own creations or reupload; You may recolor my mesh items without inculding the mesh. You may not use my recolor-textures. All my lots were created with a lot of effort. Just enjoy them as a private user. If you have changed them, I hope that is for you clear --don't claim as your own to the public and reupload in any form. In a special case, please ask me for the permission.
More Downloads BETA
Here are some more of my downloads: